-
{{link.label}}{{link.label}}
Free 12-Week Golf Workout Program
On this page

Just like you, we understand how hard it can be to make improvements when you can't spend a lot of time on the course. The right golf clubs and a good amount of practice can lead to good results on the course, but a healthy and strong body can help you achieve results that you would have never thought possible before.
At Golf Avenue, we aim to make the sport as accessible as possible to golfers everywhere and we couldn’t think of a better way to do so than to offer you access to an entirely FREE complete workout program to help you take your game to the next level.
We've already brought you the best golf stretches and the best golf exercises help you in the off-season, but this program is designed to span over a 12-week period, perfect for golfers looking to keep active when they're away from the golf course.
What you’ll find in Golf Avenue’s 12-Week Workout Program:
- How did this workout program come to be?
- How to navigate this program?
- Frequently Asked Questions and Considerations
- Accumulation Phase (Weeks 1 - 4)
- Intensification Phase (Weeks 5 - 8)
- Realization Phase (Weeks 9 - 12)
- Warm-Up
- Lucky 7 Mobility Routine
How did we create this workout program?
To help us with the creation of this program, we reached out to Coach Guillaume Smith from BKYRD, a certified personal trainer who’s worked with high-caliber athletes for years, and notably, golfers who were seeking to improve their flexibility and their power on the course.
We came to Guillaume with a clear desire to build a workout program, specifically designed to help golfers improve their performance.
Our goal with this program is to provide golfers of all levels with a program that would allow them to develop better flexibility and a wide range of motion, which in turn will produce better strikes when you’re out on the course, whether you're playing golf in the fall months of the season, or right in middle of the scoldering hot summer days.
Having worked with golfers in the past, Guillaume knew exactly what we were looking for and knew exactly how to create the perfect guide for golfers. Here’s what he had to say about this program:
“This strength training program has been built to make you improve your strength, stability, and power. The goal here was to implement a progression across 3 phases where you can then translate this power back onto the course. Without proper mobility, power is useless, you can't get in the ranges of motion you need to generate the necessary power, so we also added a mobility routine made to increase primarily your thoracic spine (the middle part) and your hips to increase range in your flexors.
Extra conditioning on your end could be great for improving recovery, aerobic capacity, and overall health. This many activities such as steady state runs, bike spins, cross-country skiing, or swimming. Something that will elevate your heart rate, but not something too intense that inhibits your ability to keep that exact pace for at least one hour.”
How to navigate this training program?
When you look at your workout make sure you complete the whole section. Single Movement, Supersets, and Giant sets are included in this program. The number followed by the Letter means there is more than one movement to a section.
In other words, on Accumulation Day B, you have three exercises labeled under A. This means that these three exercises need to be completed as a set. This means that when you’ve completed the necessary reps from A1, you move on to A2, then to A3, and you repeat the sequence until you’ve completed the required number of supersets. You will alternate between one and the other until all sets prescribed are completed.
Example of how to navigate this program:
Accumulation Day B- A1 – Landmine Squat 3x 12-15
- A2 – KB Golf Swing 3x 2repsx20secs
- A3 – Birdog Row Single arm 3x 12-15 on each side
For A1, you need the repeat a Landmine Squat 12 to 15 times. Then you move on to A2.
For A2, you perform a Kettlebell Swing motion over 2 different 20-second series. Following the second series of your set, move on to A3.
For A3, complete the Bird Row Single Arm move 12 to 15 times over with each one of your arms. If you have completed the A1 -> A2 -> A3 sequence three times over, you're done with the A block for Day B of the Accumulation Phase.
Each exercise from the main program will include a video demonstration from Guillaume to help you better understand the movements.
Frequently Asked Questions and Considerations
Before we get into the thick of things, we imagine that you probably have some questions or even some doubts about what this program entails. Fortunately, for you, Guillaume provides a series of Q&A’s, as well as some considerations to keep in mind before getting into this program.
What equipment do I need with me to complete this program?
The best option is to head to the gym, everything you will need in this program will be there. This is not a training minimalistic program, but the selections of exercises are still simple to complete at home if you have most of the basic equipment.
Here a short list of the types of equipment you'll need to complete this program:
- Kettlebells - 2 to 3
- Dumbbells - 2 to 3
- Barbell
- Swiss Ball
- Landmine Attachment
- Weight plates
- Bench
Unless you have access to all the equipment listed above at home, you'll most likely need to head to the gym. But if you can't make it to the gym, for any reason, we also provide you with alternatives to adjust the program if you want to perform it from home. Here a list of "alternatives" you can use at home.
Equipment alternatives if you want to workout at home:
- For most exercises, you can replace the kettlebells or dumbbells with any weighted object that you'll be able to hold in your hands.
- Can't replace the barbell properly, so we recommend that you simply perform the moves without the barbell when possible.
- For the Swiss Ball, you can typically use a chair or a piece of furniture that you'll be able to put your back against.
- Landmine attachments will most likely be hard to secure at home. If you have a barbell at home, simply find a spot in the ground where you'll be able to anchor it.
- The alternatives for the bench are the same as the Swiss ball. Any sort of chair or low furniture on which you can sit or lay will do just as well.
Additionnally, you can find accessories like towels, water bottles, hats, and shoes when visit our main wesbite.
How to differentiate the strain level between Pain vs Soreness?
Training will challenge you, muscles may ache, and progress is made with difficult tasks. It's important to not confuse soreness with pain. If any movement gives you any sort of BAD type of pain. STOP doing that exercise.
What should my training frequency be with this program?
To be as successful as possible you will need to stay consistent with this training program. Increase the load you use each cycle (4 weeks per cycle). If you fall off the wagon for 1 week, don't worry, restart where you stopped and try to keep the good habits of strength training twice a week. Building up resistance over time will be the key to developping faster swing speeds.
Medical Disclaimer
Do not start this fitness program if your physician or healthcare provider advises against it. If you experience faintness, dizziness, pain, or shortness of breath at any time while exercising you should stop immediately.
No assurance can be given that the advice contained in this program will ensure the results you are looking for.
You should understand that when participating in any exercise or exercise program, there is the possibility of physical injury. If you engage in this exercise or exercise program, you agree that you do so at your own risk, are voluntarily participating in these activities, assume all risk of injury to yourself, and agree to release and discharge GOLF AVENUE from any and all claims.
Now that we’ve covered your questions and addressed any cautions, it’s time to get into the real deal! Just like any physical activity where a lot of exertion is required, we’ll start off progressively with a short warm-up, specifically designed to help your body prepare for the exercises you’re about to do.
Accumulation Phase (Weeks 1-2-3-4)
This workout program spans three phases over 12 weeks. These three phases are accumulation, intensification, and realization. Each phase is designed to be performed over 4 weeks, and each phase offers two complete routines that you’ll be able to alternate between during those 4 weeks.
Let’s start with our first phase, Accumulation. This is the first phase of the program where we’re looking to acclimate your body to the movements that you’ll need to be able to perform in this program. This phase also serves to strengthen the muscles that you’ll need to rely on as progress through the subsequent phases.
To help you achieve all these objectives the number of reps and the variety of exercises will be on the higher side. This higher number of reps should help bring your body up to speed ahead of the second phase: Intensification.
Here’s a quick side-by-side look at Day A and Day B from the accumulation phase of the program. Feel free to screenshot this specific part of the program so that you can always have easy access to it.
Day A
|
Day B
|
Below, you’ll find a complete description of how to execute each of the exercises from the Accumulation phase. We’ve also included a list of the equipment that you’ll need to perform these exercises. Also, each description is accompanied by a demonstration video from Guillaume showing you how to perform them safely.
Accumulation Day A – Exercises Breakdown
A1 – Bodyweight Alternating Cossack Squat
The Bodyweight Alternating Cossack Squat is a dynamic exercise that targets the lower body, particularly the hips, thighs, and glutes. Here’s a quick video demonstrating how to do it, along with detailed instructions.
What you’ll need:
- You won’t need any equipment for this exercise.
How to do it:
-
- Stand with your feet wider than shoulder-width apart. Toes should be pointed straight or slightly outward.
- Shift your weight to one side and bend that knee, lowering your body into a squat position. The other leg should remain straight, with your heel pressed to the ground.
- Aim to lower your body as much as flexibility allows, keeping your back straight and chest up.
- Push through the heel of the bent leg to return to the starting position. Then transition to the other leg by repeating the movement on #2.
- Finish 12 to 15 reps to complete a set.
- Following your set, don’t forget to complete a set of the move in A2.
Helpful tips to keep in mind:
- Keep your core engaged for stability.
- Maintain a neutral spine throughout the movement.
- Ensure your knee tracks in line with your toes during the squat.
- You can already do this exercise at home!
A2 – Half Knee Band/Cable Archer Row
The Half-Kneeling Band Archer Row is a great exercise to target your back muscles. Watch the video below for an easy demonstration of how to execute the movement. You can also read the description for more details.
What you’ll need:
- Resistance band
How to do it:
-
- Start in a half-kneeling position with your right knee down and left foot forward.
- Anchor a resistance band to a stable structure on your left side. Hold the other end of the band in your right hand, ensuring there's tension even in the starting position.
- Start with your right hand at your chest and with your elbow bent. Begin the motion by pulling the band across your body in a rowing motion, extending your arm toward your left side.
- Focus on squeezing your shoulder blades together and keeping your core engaged.
- Return to the starting position by controlling the movement and resisting the pull of the band. Maintain a good posture throughout and avoid excessive rotation in your torso.
- Repeat the full motion 12 to 15 times to complete a set. Don’t forget to do one arm after the other.
- Don’t forget to move back to A1 if you’ve still got some super sets left to go in this block.
- Complete 3 super sets to finish block A.
Helpful tips to keep in mind:
- Keep your core stable to prevent excessive arching or leaning.
- Avoid using momentum; the focus should be on controlled muscle engagement.
- You can perform this move at home without the resistance band. The resistance won't be the same, but the movement will still be beneficial.
B1 – Split Squat
The Split Squat is a beneficial exercise that targets the muscles in your legs, particularly the quads, hamstrings, and glutes. Watch the video below for a quick tutorial or read our complete description.
What you’ll need:
- You won’t need any equipment for this exercise.
How to do it:
-
- Stand with your feet hip-width apart and take a step forward with one foot, creating a stance where your front knee is directly above your ankle.
- Lower your body straight down by bending both knees. Your back knee should hover just above the ground, and your front knee should form a 90-degree angle.
- Keep your upper body straight with your shoulders relaxed and ensure the front knee stays in line with your toes, avoiding it going past your toes.
- Push through the front heel to return to the standing position.
- Repeat the movement 10 to 12 times per side to complete a set.
- Don’t forget to move right into B2 to complete the super set.
Helpful tips to keep in mind:
- Don’t forget to engage your core through this exercise.
- While Coach Smith uses weight in the visual demonstration, you can already perform this exercise at home without the weights !
B2 – Band Pallof Press
This exercise helps improve core stability, which is beneficial for golfers looking to enhance their rotational power on the course. Check out the video below for a demonstration or read the short description that follows.
What you’ll need:
- Resistance band
How to do it:
-
- Attach a resistance band to a secure anchor point at chest height.
- Stand perpendicular to the anchor, holding the band with both hands at chest level.
- Stand with feet shoulder-width apart, engage your core, and maintain a stable stance.
- Press the band straight out in front of you, extending your arms (keep your elbows slightly bent).
- Resist rotation by preventing your body from turning toward the anchor point.
- Hold the extended position for a moment, feeling the tension in your core.
- Slowly bring the band back to the chest, maintaining control throughout the movement.
- Repeat the movement 10 to 12 times on each side to complete a set.
- Don’t forget to start the super set over with B1 if you have not completed all 4 super sets already.
Helpful tips to keep in mind:
- Keep your core engaged at all times.
- Don’t let the tension of the band pull you out of place. Get close to the anchor if the pull is too much for you to be stable.
- You can perform this move at home without the resistance band. The resistance won't be the same, but the movement will still be beneficial.
C1 – Single Arm Dumbbell Bench Press Glute Bridge
The Single Arm Dumbbell Bench Press with Glute Bridge is a compound exercise that targets both upper and lower body muscles. Watch the video for a quick demonstration or read our description for a full walkthrough.
What you’ll need:
- Dumbbell (avoid overcharging weights)
- Bench
How to do it:
-
- Lie your upper back on a bench with a dumbbell in one hand and plant your feet firmly on the ground, hip-width apart.
- Lift your hips into a glute bridge position, forming a straight line from shoulders to knees.
- Hold the dumbbell with your arm extended directly above your shoulder.
- Lower the dumbbell slowly to the side of your chest, keeping your elbow at a 90-degree angle.
- Push the dumbbell back up to the starting position, fully extending your arm, to complete a rep.
- After completing 10 to 12 repetitions on one side, switch to the other arm to complete the set.
- Move right into C2 to finish the super set.
Helpful tips to keep in mind:
- Throughout the movement, focus on engaging your glutes to maintain the bridge position.
- Keep your core engaged for stability.
- Maintain a controlled movement throughout, avoiding any rapid or jerky motions.
- Ensure proper shoulder blade retraction during the press.
- You can perform this move at home without the dumbbells. If you have other objects that you can safely hold in your hands, feel free to use those as weights.
- Replace the bench with a chair or a couch. It will serve you just as well.
C2 – Quadrupled Plank Lift Offs
Quadruped Plank Lift Offs are a great exercise for core and shoulder stability. Use the video below as an example of how to do it or read the full description included under.
What you’ll need:
- You won’t need any equipment for this exercise.
How to do it:
-
- Start in a tabletop position on your hands and knees, wrists directly under shoulders and knees under hips.
- Engage your core to maintain a flat back and keep your spine neutral.
- Lift one arm and the opposite side knee off the ground, without rotating your torso. Keep your hips level.
- Return the lifted hand and knee to the starting position and repeat with the opposite arm and leg.
- Focus on controlled movements and avoid any twisting or swaying of the hips.
- Complete 8 to 10 SLOW reps on each side to finish a set.
- Move right back into C1 if you have more super sets to complete.
- Complete 3 super sets to finish this block and Day A!
Helpful tips to keep in mind:
- Don’t forget to breathe throughout this exercise.
- Keep your core engaged and your back flat when moving.
- You can already do this exercise at home!
Accumulation Day B – Exercises Breakdown
A1 – Landmine Squat
The Landmine Squat is an effective lower-body exercise that also engages the core and upper body. Here’s a quick video demonstrating how to do it, along with detailed instructions.
What you’ll need:
- Barbell
- Weight plate (pick a weight you’re comfortable with)
- Landmine attachment (if available)
How to do it:
-
- Place a barbell into a landmine attachment or secure it to prevent the bar from sliding during the exercise.
- Load a weight plate on the end you’ll be holding. Use a weight you’re comfortable with.
- Stand facing the barbell with your feet shoulder-width apart. Grasp the barbell with both hands from the end where you’ve loaded the weight and hold the bar in front of your chest.
- Initiate the squat by pushing your hips down and bending your knees. Keep your chest up, back straight, and eyes forward.
- Lower your body until your thighs are parallel to the ground or as far as your flexibility allows.
- Drive through your heels and push your hips back up to return to the starting position to complete a rep.
- Repeat the movement 12 to 15 times to complete a set. After completing the set, move into A2, then A3 to finish out the giant set.
- Repeat this process three times over to fulfill your giant set.
Helpful tips to keep in mind:
- Keep your core engaged and maintain a controlled movement throughout.
- Avoid rounding your back; maintain a neutral spine.
- Don't let your knees collapse inward; keep them in line with your toes.
- Start with light weights to focus on form before progressing.
- You can replace the barbell and and the weight plates with free weights. The movement remains the same, but you'll be pushing your weight straight up instead of using the bar to push at an angle.
A2 – KB Golf Swing
The Kettlebell (KB) Golf Swing is a dynamic exercise that can enhance your golf performance by helping reinforce the core muscles that are most strained during the golf swing. Watch the video for a quick demonstration or read our description for a full walkthrough.
What you’ll need:
- Kettlebell (or a dumbbell if you don’t have a kettlebell)
How to do it:
-
- Stand with your feet shoulder-width apart, toes slightly turned out.
- Take a Kettlebell into your hands using an overhand grip.
- Initiate the movement by swinging the kettlebell from side to side. Make sure to keep control over the motion and not let the weight swing you around.
- Swing the kettlebell so that it hovers above your feet at its peak on either side. No need to go overboard with your weight swings.
- Allow the kettlebell to swing naturally; your arms should be relaxed, and the power comes from the hip thrust.
- Repeat the movement for 20 seconds, then rest for 10 seconds. Do this twice over to complete a set of A2.
- Don’t forget to move right into A3 after the second 10-second rest to finish out the tri-set.
Helpful tips to keep in mind:
- Maintain a neutral spine with a slight bend in your knees.
- Aim for a controlled, rhythmic movement rather than relying on arm strength.
- Begin with a lighter kettlebell to master the technique before progressing to heavier weights.
- You can perform this move at home without the kettlebell. If you have an other object that you can safely hold in your hands, feel free to use it.
A3 – Birdog Row Single Arm
The Bird-Dog Row Single Arm is a great exercise for core stability and upper body strength. Watch the video below for an easy demonstration or you can also read the description for more details.
What you’ll need:
- Bench
- Dumbbell or kettlebell
How to do it:
-
- Start in a tabletop position on a bench. Place your hands directly under your shoulders and knees under your hips.
- Take the weight in your right hand forward and extend your left leg backward, maintaining a straight line from head to heel. Don’t forget to extend the right leg when you’re working on your left arm.
- Slowly draw your right elbow up, bringing your hand towards your hip while keeping your spine neutral.
- Pause at the top of the row, squeezing your shoulder blades together. Then extend your arm back out again to complete a rep.
- Repeat the movement 12 to 15 times on both sides to complete the set.
- Move back to A1 if you’ve got more giant sets to complete.
- Finish 3 tri-sets to complete this sequence.
Helpful tips to keep in mind:
- Engage your core to stabilize your body.
- Maintain control throughout the movement.
- You can perform this move at home without the dumbbell. If you have an other object that you can safely hold in your hands, feel free to use it.
- Replace the bench with a chair or a couch. It will serve you just as well.
B1 – Half Knee Landmine Press Single Arm
The Half-Kneeling Landmine Press Single Arm is an effective exercise that targets the shoulders and core. Watch the video below for a quick tutorial or read our complete description.
What you’ll need:
- Barbell
- Landmine attachment (if available)
How to do it:
-
- Start by placing a barbell into a landmine attachment or set it securely.
- Kneel on one knee, with the knee directly under your hip. The other foot should be in front, creating a 90-degree angle at both knees. The arm on the side of the kneeling leg should be the one performing the press.
- Grab the end of the barbell with an underhand grip, positioning your hand just in front of your shoulder so that your arm is bent against your body.
- Brace your core and press the barbell upward, extending your arm fully. Keep your elbow close to your body throughout the movement.
- Lower the barbell back down to shoulder height in a controlled manner, engaging your shoulder muscles, to complete a rep.
- Repeat the movement 10 to 12 times on each side.
- Next, move right into the movement in B1 to complete a rep of the superset.
- Finish 4 supersets to complete the second sequence of Day B.
Helpful tips to keep in mind:
- Maintain a stable core to prevent excessive leaning or swaying.
- Focus on controlled movements rather than using momentum.
- Start with a lighter weight to ensure proper form before increasing resistance.
- You can replace the barbell and and the weight plates with free weights. The movement remains the same, but you'll be pushing your weight straight up instead of using the bar to push at an angle.
B2 – Low Heel Elevated Step Up
The Low Heel Elevated Step Up is a great exercise for targeting your lower body, particularly your quads, hamstrings, and glutes. Watch the video below for a quick tutorial or read our complete description.
What you’ll need:
- Step or an elevated platform (make sure it won’t move)
- 3 dumbbells (opt for smaller weights to limit the stress on your ankle and your foot)
How to do it:
-
- Place a low step or platform in front of you. Ensure it's sturdy and won't slip. The height should be such that your knee is bent, but no need to give it a 90-degree angle when your foot is on it.
- Set a dumbbell on the step. This dumbbell should be placed in a position that allows you to have your heel resting on it and your toes on the step.
- Bring your left foot on the step and have your heel up on the handle of the dumbbell and your toes on the surface of the step.
- Make sure your feet are shoulder-width and grab the other dumbbells in your hands.
- Press through your left heel, engaging your glutes and quads, and lift your body onto the step, while your right leg overs above the ground. Ensure your left knee is directly above your ankle and doesn't extend beyond your toes.
- Lower yourself back down with control to complete a rep.
- Complete 10 to 12 reps on one leg before switching to the other.
- Once you’re done with both legs, don’t forget to return to return to B1 if you’ve got more supersets left to do.
- Complete 4 supersets to be done with the “B” block of Day B.
Helpful tips to keep in mind:
- Maintain a controlled movement throughout, avoiding any sudden jerks.
- Keep your chest up and shoulders back to avoid leaning forward.
- Focus on using your leg muscles to lift, rather than pushing off with your back foot.
- You can perform this move at home without the dumbbell that set on the step of the elevated platform.
- For the other two dumbbells, feel free to use another object that you can safely hold in your hands.
- As a replacement for the step, you can use a chair or a couch. Simply make sure that any elevated surface you use won't move during the exercise.
C1 – Swiss Ball Hip Extension
The Swiss Ball Hip Extension is a great exercise to target the muscles in your glutes, hamstrings, core, hips, and lower back. Check out the video below for a demonstration or read the short description that follows.
What you’ll need:
- Swiss ball
How to do it:
-
- Get on your knees and secure the bottom of your feet flat against the wall.
- Place the Swiss ball in front of you in a way that allows you to lower your body and your hips on it.
- Lean your hips and your upper forward on the Swiss ball, bringing your head as far forward as possible. Place your hands behind your head to strengthen your position on the ball.
- From this position, lift your upper body and your head as high as you can while maintaining the connection between your hips and the ball.
- Lower your body back into the original position to complete a rep.
- Repeat this full motion 20 to 25 times to complete the C1 set.
- Move directly into C2 to complete the superset.
Helpful tips to keep in mind:
- Ensure the Swiss ball is stable; consider placing some dumbbells on its sides for added support.
- Focus on executing a stable motion, feeling the contraction in your hips and lower back.
- You can perform this move at home without the Swiss ball. You can replace it with a chair and pillows, to protect your hips, or a couch. It will serve you just as well.
C2 – Swiss Ball Single Leg Hip Raise
The Swiss Ball Single Leg Hip Raise is a great exercise for targeting the glutes and hamstrings while also engaging the core. Watch the video below for an easy demonstration of how to execute the movement. You can also read the description for more details.
What you’ll need:
- Swiss ball
How to do it:
-
- Lie on your back with your heels on top of a Swiss ball. Place your arms by your sides, palms facing down for stability.
- Raise your other legs to form a 90-degree angle with your hip and your knee.
- Press through your heel to lift your hips off the ground and keep your other leg raised through the motion.
- Lift your hips off the ground as high as your body will allow you to. Be sure to squeeze your glutes at the top of the movement.
- Slowly lower your hips back down, maintaining control, to complete a rep. Aim for a smooth, controlled motion throughout the exercise.
- Repeat the motion 12 to 15 times, on each side, to complete the set.
- Don’t forget to move back to C1 if you have a superset left to go.
- Complete 2 supersets to finish this block and Day B.
Helpful tips to keep in mind:
- Ensure the Swiss ball is stable; consider placing it against a wall for added support.
- Focus on the mind-muscle connection, feeling the contraction in your glutes.
- Engage your glutes and keep your core tight throughout the movement.
- You can perform this move at home without the Swiss ball. You can replace it with a chair or a couch. It will serve you just as well.
Intensification Phase (Weeks 5-6-7-8)
Moving onto the second phase of this workout program, Intensification. Balancing out the Accumulation phase, the Intensification phase lowers the number of reps, generally, but increases the intensity. The goal here is to use heavier loads and have a variety of more technical exercises.
While the first phase was all about acclimating your body, this second phase is designed to help you strengthen your neurological capacities so that you’re able to access new functions in your body. Connecting your body and brain is key when it comes to your on-course performance.
Here’s a quick side-by-side look at Day A and Day B from the intensification phase of the program. Don’t forget to grab a screenshot of this one as well for easy access!
Day A
|
Day B
|
Below, you’ll find a complete description of how to execute each of the exercises from the Intensification phase. We’ve also included a list of the equipment that you’ll need to perform these exercises. Also, each description is accompanied by a demonstration video from Guillaume showing you how to perform them safely.
Intensification Day A – Exercises Breakdown
A1 – Bulgarian Split Squat
The Bulgarian Split Squat is a highly effective lower body exercise that targets the quadriceps, hamstrings, and glutes. Use the video below as a reference to execute it or read the complete description following.
What you’ll need:
- Bench (or an elevated surface)
- 2 dumbbells
How to do it:
-
- With two dumbbells of a weight of your choice in hand, stand with your back to a bench or elevated surface. Take a step forward with one foot, resting the top of your rear foot on the bench behind you.
- Ensure your front knee is directly above your ankle, creating a 90-degree angle.
- Lower your body by bending your front knee, allowing your rear knee to drop towards the floor. Keep your chest upright throughout the movement.
- Lower down until your front thigh is parallel to the ground, ensuring your knee extends above your toes. Your rear knee should hover just above the floor.
- Drive through your front heel, engaging your quadriceps and glutes to return to the starting position.
- On your last rep, hold the pose for 8 seconds at the bottom of the motion.
- Repeat the motion 6 to 8 times per leg and take 30 seconds break between each leg.
- Use a full 15-second break before moving on to the second move of the superset in A2.
Helpful tips to keep in mind:
- Keep your back straight and core engaged for stability.
- You can perform this move at home without the bench. You can replace it with a chair or a couch. It will serve you just as well.
- As for the dumbbells, you can replace them with other weighted objects that you can safely hold in your hands.
A2 – KB Golf Swing 2.0
The Kettlebell (KB) Golf Swing 2.0 is another take (and what you could loosely call the evolution) of the KB Golf Swing in the Accumulation phase. Watch the video to learn how to adjust the motion for the Intensification phase or read the description for a full walkthrough.
What you’ll need:
- Kettlebell
How to do it:
-
- While holding a kettlebell with both hands in an overhand grip, stand with your feet shoulder-width apart, toes slightly turned out.
- Initiate the swing by driving your right foot to the ground and swinging the kettlebell to the left.
- Allow the kettlebell to swing naturally; your arms should be relaxed, and the power comes from the leg push and the heel turn.
- Be sure to fully turn into the swing by lifting the heel of the pushing foot off the ground and turning your hips in the direction where you’re swinging the kettlebell.
- As the kettlebell comes down, be sure to keep the momentum going by using your other leg to swing the kettlebell to the other side.
- Swing the kettlebell 8 to 10 times on both sides to complete the set.
- Take a 90-second break before returning to the move-in A1, if you have some supersets left.
- Complete 4 supersets to finish the A block.
Helpful tips to keep in mind:
- Ensure proper form to avoid strain on your lower back. Engage your core throughout the movement.
- Begin with a lighter kettlebell to master the technique before progressing to heavier weights.
- You can perform this move at home without the kettlebell. If you have an other object that you can safely hold in your hands, feel free to use it.
B1 – Cossack Slider Squat
The Cossack Slider Squat is a dynamic exercise that targets multiple muscle groups, including the inner thighs, glutes, and quadriceps. Use the video below as a reference or read the description for more details.
What you’ll need:
- Dumbbell (or kettlebell)
- Slide (or smooth surface on which you can slide your foot)
How to do it:
-
- While holding a dumbbell with both hands in front of your chest, stand with your feet wider than shoulder-width apart, and place a slider (or another smooth-surfaced flat object) under one foot.
- Slightly bend the knee of the leg standing on the slider (for better control) and keep the other leg straight.
- Lower your body into a squat position on the leg that is not on the slider. While lowering into the squat, extend out the leg with the slide to the side. Ensure the straight leg remains extended, toes pointing forward.
- Lower your body as far as comfortable while maintaining good form, keeping your back straight and chest up.
- Push through the heel of the bent leg, sliding the foot back to the starting position, when you were standing.
- Repeat the motion 10 to 15 times on each leg.
- When you’re done with the reps from both legs, head to the move in B2.
Helpful tips to keep in mind:
- Start with a limited range of motion and gradually increase as you become more comfortable with the exercise.
- Engage your core for stability throughout the movement.
- Control the movement to avoid excessive strain on the knees.
- You can perform this move at home without the kettlebell. If you have an other object that you can safely hold in your hands, feel free to use it.
- If you don’t have a slider, you can also take your shoes off and keep your socks on to perform this drill if you’re on a surface that allows you to slide your feet.
B2 – Half Knee Band Chop Low to High
The Half Knee Band Chop Low to High is a functional exercise that engages your core and works on rotational strength. The movement should help improve your capacity to hit through the ball at impact.
What you’ll need:
- Resistance band
How to do it:
-
- Begin in a half-kneeling position, with one knee on the ground and the other foot forward, creating a 90-degree angle at the front knee. Anchor a resistance band low and to the side of your kneeled leg.
- Grasp the resistance band with both hands, ensuring a firm grip, with both arms extended away from you. Your hands should be together at the start, and you should start the motion as close as possible to the anchor point while always applying a little resistance to the band.
- Initiate the movement by rotating your torso, pulling the band diagonally across your body from low on one side to high on the other. The movement should resemble a chopping motion.
- Execute the chop in a controlled and deliberate manner, emphasizing the engagement of the muscles involved. Avoid using momentum to complete the movement.
- Slowly reverse the movement, bringing the band back to the starting position to complete a rep. Maintain control and resist the band's pull.
- Repeat the motion 10 to 15 times on each side of the body.
- Once you’re done with both sides, head to the move in B3.
Helpful tips to keep in mind:
- As you rotate, engage your core muscles to stabilize your spine. Keep your back straight throughout the movement.
- Start with a light resistance band and gradually progress as you build strength.
- You can perform this move at home without the resistance band. The resistance won't be the same, but the movement will still be beneficial.
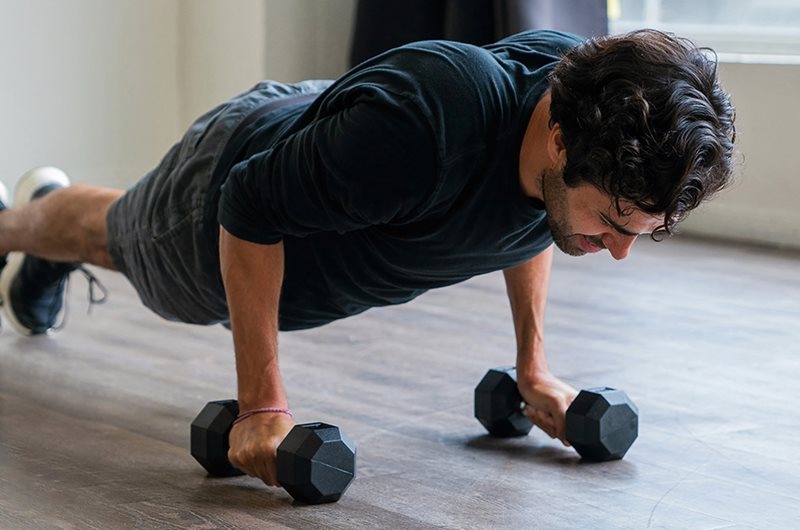
B3 – Negative DB Push-Ups
A Negative Dumbbell Push-Up is a challenging exercise that focuses on the eccentric (lengthening) phase of the push-up movement. This exercise places extra emphasis on muscle control and strength during the lowering phase, targeting the chest, shoulders, and triceps effectively. As always, use the video below as a reference or consult the full breakdown that follows.
What you’ll need:
- 2 dumbbells
How to do it:
-
- Start in a push-up position with a dumbbell in each hand, wrists aligned with your shoulders.
- Lower your body slowly towards the ground, taking at least 3-5 seconds for the descent.
- Once your chest touches the ground, slowly let the rest of your body touch the ground as well for a second.
- Next, lift your upper body while keeping your knees on the ground.
- Finally, return to your complete position to start the next rep.
- Complete 6 to 8 reps to finish this movement.
- Move on to the move in B4 to continue the giant set.
Helpful tips to keep in mind:
- Make sure to use dumbbells that’ll help prevent you from rolling your wrists.
- Keep your core engaged and maintain a straight line from your head to your heels.
- You can perform this move at home without the dumbbells. You can replace them with other weighted objects that you can safely hold in your hands.
B4 – Seated Band Row
The Seated Band Row is an effective exercise to target the muscles in your upper back and improve your posture, both crucial aspects of the golf swing. Use the video below as a reference or read the complete description for more details.
What you’ll need:
- Resistance band (with handles ideally)
How to do it:
-
- Sit on the floor with your legs extended. If your band is long enough, loop it on and anchor point in front of you. If it’s not long enough, loop it around the soles of your feet.
- Hold the ends of the band in each hand, keeping your arms extended in front of you. Ensure there is tension in the band.
- Initiate the movement by pulling your elbows back and squeezing your shoulder blades together. Focus on engaging your upper back muscles.
- Slowly return to the starting position, maintaining control throughout the motion. Avoid letting the band pull your arms back too quickly.
- Repeat the motion 10 to 15 times to complete the set.
- You need to complete 3 giant sets of the moves in block B, so if you’ve got some left, go back to B1, otherwise, you’re done with this block.
Helpful tips to keep in mind:
- Ensure proper band tension for a challenging but controlled movement.
- Focus on maintaining good posture throughout the exercise.
- You can perform this move at home without the resistance band. If you plan on performing this movement, be sure to exagerate the motion and the squeeze between your shoulder blades to maximize the effeciency, despite the lack of resistance.
C – Zottman Curls
Zottman Curls are a great exercise that targets both the biceps and forearms. This exercise engages both the upward and downward phases of the movement, working the biceps during the curl and the forearms during the controlled descent. The video below is a demonstration of how to do the motion, but you can also consult our full description.
What you’ll need:
- 2 dumbbells
How to do it:
-
- Start with a dumbbell in each hand, palms facing your body.
- Perform a standard bicep curl by lifting the weights toward your shoulders, keeping your elbows close to your body. Don’t forget to turn your palms in the direction where the dumbbells are moving.
- At the top of the curl, rotate your wrists so that your palms are now facing away from your body.
- Slowly lower the dumbbells back to the starting position with your palms facing down.
- Repeat the motion 20 times and complete two different sets.
- This wraps up Day A of the Intensification period!
Helpful tips to keep in mind:
- Make sure you’re standing up and that your posture is proper.
- You can perform this move at home without the dumbbells. You can replace them with other weighted objects that you can safely hold in your hands.
Intensification Day B – Exercise Breakdown
A1 – Swiss Ball DB Incline Press
The Swiss ball dumbbell incline press is a great exercise to target your upper chest and shoulders. Watch the video below and use it as a reference, and for more details consult the complete breakdown that follows.
What you’ll need:
- Swiss ball (or incline bench)
- 2 dumbbells
How to do it:
-
- Set the Swiss ball against a wall or a solid structure that can hold your weight.
- With a dumbbell in each hand, sit down on the ground with your back against the Swiss ball. Lean back on it until your back is inclined at an angle between 15 to 30 degrees.
- Hold the dumbbells with an overhand grip, palms facing towards each other. Your wrists should be in a neutral position.
- Plant your feet firmly on the ground and engage your core. Your back should be flat against the ball, maintaining a natural arch in your spine.
- Lower the dumbbells slowly and with control, allowing your elbows to bend at a 90-degree angle. Keep your shoulder blades retracted.
- Press the dumbbells back up to the starting position, fully extending your arms without locking your elbows. Focus on squeezing your chest muscles at the top.
- Repeat the move 10 to 12 times to complete a set.
- After your set, take a 45-second break before moving into A2.
Helpful tips to keep in mind:
- Inhale as you lower the weights and exhale as you push them back up.
- You can use an incline bench instead of the ball if you can’t get your hands on one.
- You can perform this move at home without the Swiss ball. You can replace it with a chair or a couch. It will serve you just as well.
- As for the dumbbells, you can replace them with other weighted objects that you can safely hold in your hands.
A2 – Swiss Ball Leg Curl Super Tempo
The Swiss Ball Leg Curl Super Tempo is a challenging exercise that targets the hamstrings and glutes. The tempo of how you roll the ball plays a key role in this exercise, be sure to give it a look to help you visualize it better. Don’t forget to read the description for helpful tips.
What you’ll need:
- Swiss ball
How to do it:
-
- Start by lying on your back with a Swiss ball positioned near your feet.
- Place your heels on top of the ball and lift your hips, creating a straight line from your shoulders to your heels.
- Engage your core and keep your hips elevated throughout the exercise.
- Slowly roll the ball away from your body by extending your knees and shuffling your heels in a controlled fashion.
- Once your legs are fully extended and your feet are resting on top of the ball, pull back your legs to return to the starting position in a single motion.
- Repeat the motion 8 to 10 times to finish out the set.
- Take a 90-second break before going ahead with the next move.
- If you’ve got reps left to your superset, head back to A1, otherwise, move on to the B block.
- Complete 4 supersets to finish out the A block.
Helpful tips to keep in mind:
- Focus on maintaining control and using a slow, deliberate tempo for both the leg curl and hip extension phases.
- You can perform this move at home without the Swiss ball. You can replace it with a chair or a foot rest. You just have to make sure that the chair or foot rest can easily slide on the ground. In this case, instead of rolling the ball, you simply push and pull the chair or foot rest.
B1 – Suitcase Single Arm Deadlift
The Suitcase Single-Arm Deadlift is a great exercise to target your core, lower back, and hips. This exercise should contribute to developing your ability to push off the ground, especially when you’re looking to hit the ball further. Use the video as a reference or read the short description of this simple, yet effective move.
What you’ll need:
- Kettlebell or dumbbell
How to do it:
-
- Stand with your feet hip-width apart, a kettlebell or a dumbbell on the outside of one foot.
- Hinge at your hips, as if you were squatting, keeping your back flat and chest up, to reach down and grasp the weight with the hand closest to it.
- Engage your core, maintain a neutral spine, and lift the weight by straightening your hips and knees. Keep your free hand by your side for balance.
- Stand tall, ensuring your shoulders are level and hips are fully extended.
- Lower the weight back down with control, maintaining good form, to complete a rep.
- Repeat the move 8 to 10 times on each side to finish the set.
- Transition right into the move in B2.
Helpful tips to keep in mind:
- Keep the weight close to your body throughout the movement.
- Focus on a controlled descent to maximize muscle engagement.
- Perform equal reps on both sides to maintain balance and prevent muscle imbalances.
- You can perform this move at home without the kettlebell or dumbbell. You can replace it with another weighted object that you can safely hold in your hands.
B2 – Side Knee Plank
The Side Knee Plank is a great exercise for targeting the obliques and improving core strength. This is a simple, yet challenging move. Watch the video below for a quick demonstration or read the short description on how to do it.
What you’ll need:
- You won’t need any equipment for this exercise.
How to do it:
-
- Begin by lying on your side, propping your upper body on your elbow directly beneath your shoulder.
- Stack your legs on top of each other and keep a slight bent to them for better balance.
- Lift your hips off the ground, creating as straight a line as possible from your head to your heels.
- Lift the leg on top creating a gap between your two legs. You should feel a bit of tension in your hips for the move to be fully efficient.
- Hold the position for 30 to 60 seconds on each side to complete a rep.
- If you’ve got reps left to your superset, head back to B1, otherwise, move on to the C block.
- Complete 3 supersets to finish out the B block.
Helpful tips to keep in mind:
- Engage your core muscles throughout the exercise.
- Keep your elbow directly beneath your shoulder to maintain proper alignment.
- You can already do this exercise at home!
C1 – Pronated to Supinated DB Row
The Pronated to Supinated Dumbbell Row is an effective exercise for targeting various muscles in your back. Watch the video below for a quick tutorial or read the description that follows for more details.
What you’ll need:
- Bench
- Dumbbell
How to do it:
-
- With your feet shoulder-width apart, rest one knee on a bench while standing up on your other leg.
- Take a dumbbell in the hand on the side of the leg standing on the ground. Your palm should be facing the extended leg (pronated grip).
- Lean forward using your free hand as support to keep your back straight throughout the move. Let the dumbbell hang down while keeping your palm in a pronated grip.
- Pull the dumbbell towards your chest, keeping your elbow close to your body.
- At the top of the row, rotate your wrists so your palm points in the same direction as the one you’re facing (supinated grip).
- Lower the dumbbells back to the starting position in a controlled manner, reversing the grip as you go.
- Repeat the motion 10 to 12 times on both arms.
- After completing your set, move right to the move in C2.
Helpful tips to keep in mind:
- Focus on squeezing your shoulder blades together at the top of the movement.
- Maintain a neutral spine throughout.
- Control the movement throughout, focusing on both the pronated and supinated phases.
- Choose a weight that allows you to maintain proper form.
How to adjust this exercice at home:
- You can perform this move at home without the bench. You can replace it with a chair or a couch. It will serve you just as well.
- As for the dumbbell, you can replace it with another weighted object that you can safely hold in your hands.
C2 – Single Leg Rev Crunch
The Single Leg Reverse Crunch is a great exercise for targeting the lower abdominal muscles, which are highly solicited through the golf swing. Watch the video below for a demonstration or use the complete description provided under.
What you’ll need:
- Structure to hold on to
How to do it:
-
- Lie on your back with your hands grabbing a structure that will keep your upper body to the ground.
- Lift your legs off the ground, bending one of them at a 90-degree angle. This is your starting position.
- While keeping both legs in the air, and one at a 90-degree angle, engage your lower abs to lift your lower body above your head.
- Slowly lower your lower body back to its original position.
- Switch your legs up (one extended, one bent) on every rep, or do all the reps one side at a time.
- Repeat the move 8 to 10 times on each side to complete the set.
- If you’ve got reps left to your superset, head back to C1, otherwise, you’re done with the Day B of the Integration period.
- Complete 3 supersets to finish out the C block.
Helpful tips to keep in mind:
- Perform the exercise with controlled movements, engaging your core throughout.
- You can already do this exercise at home! Simply hold on to something heavy or a door frame.
Realization Phase (Weeks 9-10-11-12)
You’ve reached the third and final phase of this workout program, Realization. As the name suggests, this phase of the program is where you put it all together to realize your objective of surpassing your limits.
This phase is not as much concerned with workload and the amount of reps, rather, in this last phase, the goal is to challenge your body to reach new heights dynamically.
Here’s a quick side-by-side look at Day A and Day B from the realization phase of the program. Don’t forget to grab a screenshot of this one as well for easy access!
Day A
|
Day B
|
Below, you’ll find a complete description of how to execute each of the exercises from the Realization phase. We’ve also included a list of the equipment that you’ll need to perform these exercises. Also, each description is accompanied by a demonstration video from Guillaume showing you how to perform them safely.
Realization Day A – Exercises Breakdown
A1 – DB Reverse Lunge
The Dumbbell Reverse Lunge is an effective exercise for targeting the muscles in your legs and glutes. Use the video below as a reference or read the short description that follows to execute this simple move.
What you’ll need:
- 2 dumbbells
How to do it:
-
- Stand with your feet shoulder-width apart, holding a dumbbell in each hand by your sides. Maintain a straight posture with your shoulders back.
- Take a controlled step backward with one leg, lowering your body toward the ground. The rear knee should hover just above the floor.
- Ensure that your front knee is directly above your ankle, forming a 90-degree angle. Keep your weight on your front heel.
- Push through your front heel to return to the starting position. Bring your rear foot back to the starting position beside the front foot.
- Perform the same movement on the opposite leg, alternating between legs on every rep.
- Focus on using weights that feel challenging and maintaining a controlled movement throughout the action.
- Complete 8 to 10 reps on each side.
- Then, move on to the next exercise in A2.
Helpful tips to keep in mind:
- Keep your core engaged throughout the exercise to maintain balance.
- Maintain a steady pace and avoid rushing the movement.
- Focus on control and proper form to maximize effectiveness and minimize the risk of injury.
- Start with lower weight and build up over time as you progress through the weeks.
- You can perform this move at home without the dumbbells. You can replace the with other weighted objects that you can safely hold in your hands.
A2 – Sidestep in Cossack Squat
The Sidestep in Cossack Squat is a dynamic exercise that combines lateral movement with lower body strength. Watch the video below for a quick tutorial or read the description that follows for more details.
What you’ll need:
- You won’t need any equipment for this exercise.
How to do it:
-
- Begin standing up with your feet shoulder-width apart.
- Lift one leg and lower your body into a Cossack Squat on the side of the lifted leg.
- Use the lifted leg to catch your step and lower yourself into the Cossack Squat.
- Drive the heel of the squatting leg to the ground to return to the original position to complete a rep.
- Repeat the motion 6 to 8 times on each side to finish out the set.
- Following your set, take a 90 to 120-second break before returning to A1 if you have more supersets left, otherwise, move to block B after your break.
- Complete 4 supersets of block A before moving on to block B.
Helpful tips to keep in mind:
- Keep your back straight and chest up throughout the movement.
- Engage your core for stability.
- Ensure your knee is aligned with your toes during the squat.
- Sidestep with control, maintaining balance.
- You can already do this exercise at home!
B1 – Swiss Ball DB Press Alternating Arms
The Swiss Ball Dumbbell Press Alternating Arms is a great exercise that targets the chest, shoulders, and core. The video below provides a simple example, but you can also read our short description for a full breakdown.
What you’ll need:
- Swiss ball
- 2 dumbbells
How to do it:
-
- Sit on a stability ball with a dumbbell in each hand, palms facing forward.
- Walk your feet forward, allowing the ball to roll underneath you until your upper back and shoulders are resting on it.
- Start with the dumbbells directly above your chest, arms extended.
- Lower one dumbbell while keeping the other extended.
- Raise the dumbbell back to its original position to complete a rep.
- Execute the same motion with the other arm to complete another one.
- Keep alternating between arms from one rep to the next.
- Complete 10 to 12 reps from each arm to finish a set.
- Once you’ve finished your set, move on to the next exercise of the superset in B2.
Helpful tips to keep in mind:
- Use a weight that challenges you without sacrificing form.
- Engage your core and lift your hips, forming a straight line from your shoulders to your knees.
- You can perform this move at home without the Swiss ball. You can replace it with a chair or a couch. It will serve you just as well.
- As for the dumbbells, you can replace them with other weighted objects that you can safely hold in your hands.
B2 – Landmine Pronated Row
The Landmine Pronated Row is an effective exercise that targets the muscles in your back and arms. Use the video below as a reference or read the description for more details.
What you’ll need:
- Barbell
- Landmine attachment (if available)
How to do it:
-
- Place one end of a barbell in a landmine attachment or securely anchor it in a corner.
- Stand with your feet shoulder-width apart, next to the end of the barbell. Take a long step backward with the leg closest to the barbell so as to be in a lunge position, with your leg extending at the back.
- Grasp the barbell with an overhand grip (pronated), letting it hang in your hand, below your shoulder.
- Pull the barbell towards your chest, keeping your elbows close to your body.
- Lower the barbell back down in a controlled manner, fully extending your arms to complete a rep.
- Produce 10 to 12 reps on each side to finish the set.
- Return to B1 if you have more supersets left, otherwise, move to block C.
- Complete 3 supersets of block B before moving on to block C.
Helpful tips to keep in mind:
- Focus on squeezing your shoulder blades together at the top of the movement.
- Had weights to the barbell if you’re looking for an additional challenge.
- You can replace the barbell with free weights. The movement remains the same, but you'll be pulling your weight straight up instead of using the bar.
C1 – Standing Low to High Band Chop
The Standing Low to High Band Chop is an effective exercise that engages your core, shoulders, and hips. Use the video below as a reference to execute it or read the complete description following.
What you’ll need:
- Resistance band
How to do it:
-
- Attach a resistance band to a sturdy anchor at a low point and stand perpendicular to the anchor with your feet shoulder-width apart.
- Hold the band with both hands, starting low on one side.
- Initiate the motion by rotating your torso, pulling the band diagonally across your body from the low point to a high one.
- Pivot on your back foot and allow your hips to follow the rotation.
- Fully extend your arms and finish with the band above shoulder height.
- Control the return to the starting position, resisting the band's pull.
- Repeat the motion for 15 to 20 seconds, then do it again from the other side.
- Take a short 20 to 30-second break, then continue with the move in C2.
Helpful tips to keep in mind:
- Keep your core engaged and maintain a slight bend in your knees.
- Focus on a smooth, controlled motion.
- Ensure proper posture with a straight back.
- You can perform this move at home without the resistance band. The resistance won't be the same, but the movement will still be beneficial.
C2 – Standing High to Low Band Chop
The Standing High to Low Band Chop is a dynamic exercise that engages multiple muscle groups. It’s very reminiscent of a golf swing, so the motion should come naturally to most golfers. Watch the video below for a short demonstration or read our description for a step-by-step breakdown.
What you’ll need:
- Resistance band
How to do it:
-
- Attach a resistance band to a stable anchor point above shoulder height. Stand with your feet shoulder-width apart, parallel to the anchor point, and hold the band with both hands.
- Grasp the band with both hands, with your arms extended, and ensure a firm grip.
- Initiate the movement by rotating your torso and pulling the band diagonally across your body, moving from high to low. Keep your core engaged throughout the movement.
- Rotate your hips and shoulders simultaneously as you perform the chop. The rotation should come from your core muscles, emphasizing the obliques.
- Maintain control as you return to the starting position, resisting the band's pull. Control is crucial for maximizing the benefits and preventing injury.
- Complete 15 to 20 reps on each side. Keep control over the motion all the time but try to emphasize speed.
- Take a 40 to 60-second break, before returning to C1 if you have more supersets left, otherwise, you’re finished with Day A of the realization period.
- Complete 5 supersets of block C.
Helpful tips to keep in mind:
- Ensure proper form to avoid strain, especially on the lower back.
- Start with lighter resistance and gradually increase as strength improves.
- You can perform this move at home without the resistance band. The resistance won't be the same, but the movement will still be beneficial.
Realization Day B – Exercises Breakdown
A1 – Wide Stance Seated Box Squat
The Wide Stance Seated Box Squat is a variation of the traditional squat that emphasizes hip and glute engagement. This is another key drill that will help you generate more distance off your strikes on the course. The video below provides a simple example, but you can also read our short description for a full breakdown.
What you’ll need:
- Bench (chair, or sturdy box)
- Kettlebell (or dumbbell)
How to do it:
-
- Place a sturdy box or bench behind you at a height where, when seated, your thighs are parallel to the ground.
- Take a wide stance with your feet, positioning them slightly wider than shoulder-width apart. Point your toes slightly outward.
- Grab a kettlebell with both your hands and hold it in front of your chest. Keep the weight close to you by bending your elbows and keeping them along your side.
- Stand with your chest up, engaging your core. Slowly lower your body back onto the bench, pushing your hips back first, as if sitting back into a chair.
- Keep your back straight and chest up throughout the movement. Avoid rounding your lower back.
- Aim to descend until your thighs are parallel to the ground or slightly below. Pause briefly on the box to eliminate momentum.
- To ascend, drive through your heels, engaging your glutes and hamstrings. Stand up fully and rapidly, extending your hips, to complete a rep.
- Repeat the move 6 to 10 to finish a set.
- After completing a set, transition to the move in A2.
Helpful tips to keep in mind:
- Emphasize the slow descent and the explosive ascent.
- Ensure proper box height to maintain the right depth.
- Focus on hip hinge and glute activation.
- Control the descent and ascent to maximize muscle engagement.
- Pay attention to foot positioning for stability.
- You can perform this move at home without the bench. You can replace it with a chair or a couch. It will serve you just as well.
- As for the kettlebell, you can replace it with another weighted object that you can safely hold in your hands.
A2 – Single Arm KB Swing
The Single Arm Kettlebell Swing is a dynamic exercise that targets multiple muscle groups, particularly the hips, glutes, and core. Watch the video for a quick demonstration or read our description for a full walkthrough.
What you’ll need:
- Kettlebell
How to do it:
-
- Start with your feet shoulder-width apart and place a kettlebell on the ground between your feet.
- Hinge at the hips, keeping your back straight, and grasp the kettlebell with one hand.
- Engage your core, and with a slight bend in your knees, drive your hips forward, swinging the kettlebell between your legs.
- As the kettlebell reaches its lowest point, explosively extend your hips, bringing the kettlebell up to shoulder height with a straight arm.
- Control the descent, allowing the kettlebell to swing back between your legs before initiating the next rep.
- Repeat the move 6 to 10 times with each arm to finish a set.
- Take a 90-second break after completing a superset from block A.
- If you have more supersets left in block A, return to the move in A1, otherwise head to the move in B1.
- Complete 5 supersets to finish block A.
Helpful tips to keep in mind:
- Maintain proper form throughout the exercise.
- Start with a lightweight to ensure you can perform the movement safely and effectively.
- You can perform this move at home without the kettlebell. If you have an other object that you can safely hold in your hands, feel free to use it.
B1 – Landmine Rotational Punch
The Landmine Rotational Punch is an effective exercise that targets the core, shoulders, and hips. Watch the video below for an easy demonstration of how to execute the movement. You can also read the description for more details.
What you’ll need:
- Barbell
- Landmine attachment (if available)
How to do it:
-
- Begin by placing a barbell into a landmine attachment or securely anchoring it in a corner. Load an appropriate weight onto the free end.
- Stand with your feet shoulder-width apart, parallel to the barbell. Hold the loaded end of the barbell with one hand, keeping your arms extended.
- Rotate your torso towards the barbell, pivoting on the balls of your feet. Simultaneously, switch the hand holding the barbell and punch it up and across your body, extending your arm fully.
- Bring the barbell back to the starting position in a controlled manner. Be sure to switch hands again when bringing the weight down.
- Stay dynamic and preserve a good flow throughout the move.
- Complete 10 to 15 reps on each side to wrap up a set.
- Once you’re set is done, transition to the move in B2.
Helpful tips to keep in mind:
- Start with lighter weights to focus on proper form before increasing resistance.
- Engage your core and maintain a stable lower body throughout the exercise.
- Control the movement to avoid strain on your back and shoulders.
- You can replace the barbell with free weights. The movement remains the same, but you'll be pulling your weight straight up instead of using the bar.
B2 – Split Stance Band Row Twist
The Split Stance Band Row Twist is a dynamic exercise that targets multiple muscle groups. Here’s a quick video demonstrating how to do it, along with detailed instructions.
What you’ll need:
- Resistance band
How to do it:
-
- Attach a resistance band to a stable anchor point at chest height. Assume a split stance with one foot forward and the other backward. Hold the band handle in the hand opposite to your forward foot.
- Begin with your arm fully extended, and shoulders squared. Pull the band handle towards the side of your chest, engaging your back muscles. Keep your elbow close to your body and squeeze your shoulder blades together.
- As you reach the end of the row, add a torso twist towards the back leg and turn the palm of your pulling hand towards your chest. Rotate through your core, feeling the contraction in your obliques.
- Return to the starting position, maintaining control, but stay dynamic by going right into the next rep.
- Complete 15 to 20 reps on each side to wrap up the set.
- After this set, transition right into the move in B3.
Helpful tips to keep in mind:
- Keep a stable lower body throughout the movement.
- Control the band and focus on the mind-muscle connection.
- Engage your core during the twist for added stability.
- You can perform this move at home without the resistance band. The resistance won't be the same, but the movement will still be beneficial.
B3 – Swiss Ball Single Leg Curl
The Swiss Ball Single Leg Curl is a great exercise to target your hamstrings and glutes. Watch the video below for a quick tutorial or read our complete description.
What you’ll need:
- Swiss ball
How to do it:
-
- Begin by lying on your back with your heels on a Swiss ball. Place your arms by your sides for stability.
- Lift your hips off the ground, forming a straight line from your shoulders to your heels. Engage your core muscles to maintain stability.
- While bending one of your knees by bringing it close to your chest, keep one foot on the ball and use your heel to roll the ball towards your glutes. Focus on contracting your hamstrings throughout the movement.
- Straighten your leg still on the ball, rolling it back to the starting position to complete a rep. Keep your hips elevated and maintain control.
- Avoid rushing through the move but try to have a dynamic rhythm and keep the motion flowing.
- Repeat the motion 10 to 15 times with each leg to finish out a set.
- If you have more supersets left in block B, return to the move in B1, otherwise head to the move in C1.
- Complete 4 tri-sets to finish block B.
Helpful tips to keep in mind:
- Ensure your shoulders and upper back remain on the ground.
- Control the movement to engage your muscles effectively.
- Despite looking to be dynamic, aim for a smooth, controlled motion, and avoid jerky movements.
- You can perform this move at home without the Swiss ball. You can replace it with a chair or a foot rest. You just have to make sure that the chair or foot rest can easily slide on the ground. In this case, instead of rolling the ball, you simply push and pull the chair or foot rest.
C1 – Single Leg Deadlift
The Single Leg Deadlift is a great exercise for enhancing stability and strengthening the posterior chain. Watch the video below for an easy demonstration or you can also read the description for more details.
What you’ll need:
- Kettlebell (or dumbbell)
How to do it:
-
- Stand with your feet hip-width apart while holding a kettlebell in one of your hands.
- Shift your weight onto the leg on the opposite side of the hand holding the weight while maintaining a slight bend in the knee.
- Hinge at your hips and extend the non-weight-bearing leg straight behind you as you lower the kettlebell to hover just above the ground.
- Engage your glutes and hamstrings to return to the upright position.
- Focus on a slow and controlled movement to maximize muscle engagement.
- Repeat the move 10 to 15 times on each leg to finish out a set.
- Transition to the move in C2 once you’ve completed your set.
Helpful tips to keep in mind:
- Keep your gaze fixed on a point on the floor to aid balance.
- Start with bodyweight and gradually add resistance as you master the technique.
- You can perform this move at home without the kettlebell. If you have an other object that you can safely hold in your hands, feel free to use it.
C2 – Swiss Ball Side Crunch
The Swiss Ball Side Crunch is an effective exercise that targets the obliques and helps improve core strength. Use the video below as a reference to execute it or read the complete description following.
What you’ll need:
- Swiss ball
How to do it:
-
- Sit on a Swiss ball with your feet flat on the floor, shoulder-width apart. Walk your feet forward, allowing the ball to roll underneath your lower back. Turn your body to one side until your torso and spine are parallel to the ground.
- Ensure your hips and shoulders are in line. Engage your core muscles to stabilize your body on the ball.
- Place your hands behind your head, keeping your elbows wide. This helps to avoid pulling on your neck during the exercise.
- Exhale and contract your obliques to lift your upper body sideways towards your hip. Keep the movement controlled and avoid using momentum.
- Hold the crunch position for a moment, feeling the contraction in your obliques.
- Lower your upper body back down to the starting position, maintaining control, to complete a rep.
- Execute 10 to 15 reps on each side of your body to finish out the set.
- If you have more supersets left in block C, return to the move in C1.
- Complete 3 tri-sets to finish block C and this workout program!
Helpful tips to keep in mind:
- Start with a comfortable range of motion and gradually increase as your strength improves.
- Focus on quality over quantity to ensure proper form.
- Keep your movements slow and controlled to maximize muscle engagement.
- You can perform this move at home without the Swiss ball. You can replace it with a chair and pillows, to protect your hips, or a couch. It will serve you just as well.
Warm-Up Routine
In terms of warm-up, you’ll want to complete a quick warm-up before every workout session. The goal is to raise the heart rate a bit and heat up your body a little. No need to go overboard with the effort and attempt a PR here. Take it easy to start off your workout.
Multiple options are available to you for this warm-up. Feel free to get on a cardio machine for 3 to 5 minutes (Ski, Bike, Row, Treadmill, StairMaster). Try alternating machines from session to session to maximize your body’s versatility (and it’ll help to keep you motivated!).
Once you’ve completed your short cardio warm-up, Guillaume has a few extra exercises that will help get your body prepared for the physical exertion that you’ll be doing. We’ll include a quick description for each exercise listed below.
- Single Leg Calf Raise to Knee
- Airplane Hip Rotation Supported
- Band W to Y
- 90/90 Hip Washers
- Seated Foam Roll Trunk Rotation
- Foam Roll Thoracic Spine Extension
Single Leg Calf Raise to Knee
For this one, we’re looking to work on the legs first. So, here’s a quick rundown on how to complete it:
-
- Stand upright with good posture, engaging your core for stability.
- Lift one leg off the ground, keeping it straight or with a slight bend in the knee for comfort.
- Balance on the standing leg and rise onto your toes by lifting your heel as high as possible.
- As you reach the top position, also bring your lifted knee towards your chest, creating a flexion movement.
- Hold the top position briefly, ensuring a controlled movement.
- Lower your heel back down, returning to the starting position.
- Repeat the movement 10 to 15 times on one leg before switching to the other.
Airplane Hip Rotation Supported
This second exercise aims to activate your core and your hips. You’ll need something to grab on for support for this one, and here’s how you should do it:
-
- Stand with your feet apart and extend your arms straight out to the side.
- Bend your upper body forward while extending one of your legs backward as you bend forward. As you bend forward, you can use your support to help balance yourself out.
- Once in position, turn the foot of your extended leg to the inside so that your leg turns to the inside all the way up to your hips. From there, you’ll turn your foot to the exterior and you’ll open your hips with the same motion.
- From the open hip position, turn back to the closed hip position to complete a rep.
- Repeat the movement 10 to 15 times, on each leg, to really feel the stretch.
Band W to Y
This third exercise will help with your upper body, and more specifically, your arms and shoulders. Here’s how to do it:
-
- Set up a resistance band on a rack (or a solid object that won’t move). Make sure the band is about chest high.
- Stand in front of the installation with your feet apart and grab each end of the resistance band with one hand.
- While holding on to the band, bring your hands near your shoulders, but make sure to keep them on each side of your body. In this position, your upper body and your arms should form a “W”. This is our starting point.
- From there, you’ll want to raise your arms in an open position. In other words, you’re looking to make a “Y” shape with your body and your arms. Bring your arms back in the “W” position to complete a rep.
- Repeat this movement 10 to 15 times for maximum efficiency.
- Don’t forget to keep the resistance band stretched out during this exercise.
- If the resistance is too great on the band, either get a less resistant one or simply get closer to your installation to limit the resistance for warm-ups.
90/90 Hip Washers
This next exercise is also aimed to help loosen your hip and work on your hip mobility. This is how you should do it:
-
- Begin in a seated position with your legs bent at a 90-degree angle at the knees, forming an "L" shape. You can use your arms for support behind you or along the sides.
- Start activating the motion by turning your torso and your hips to the left. This motion will force you to rest the outside of your left leg on the ground, while the inside of your right leg should be parallel to the ground (or resting on the ground if you’re flexible enough).
- From the left side position, rotate your torso and your hips as well as flipping your legs to the opposite direction to complete a rep.
- Repeat the movement between 10 to 15 times for each side.
Seated Foam Roll Trunk Rotation
Next up, this rotational exercise will engage your core and your back to help you build a stronger mid-section. Note that you’ll need a foam roller or something similar to help you out. Here are the steps to doing it right:
-
- Sit on the floor with your knees bent at a 90-degree angle and place a foam roller horizontally behind your hips.
- Slightly lean backward on the foam roller to engage your core and cross your arms over your chest.
- Rotate your upper body to your left, turning your torso, your head, and your arms, while keeping your hips in contact with the foam roller.
- Rotate to your right and maintain contact with the foam roller to complete a rep.
- Complete 5 to 10 full reps to maximize efficiency.
Foam Roll Thoracic Spine Extension
Finally, this extension exercise will help loosen the upper part of your back and your torso. It’s a simple, yet effective stretch, so, here’s how you do it:
-
- Sit on the floor with the foam roller placed horizontally behind your upper back.
- Support your head with your hands, keeping your elbows wide.
- Tighten your core to provide stability and protect your lower back during the movement.
- Slowly roll up and down the thoracic spine, focusing on the area between the shoulder blades. Roll up and down to complete one full extension.
- Pause and apply gentle pressure on any tight or tender spots.
- Go through 5 to 10 full extensions to complete your warm-up routine.
For this last part of the warm-up, make sure to complete one or two sets of the exercises listed above. Adjust the number of reps based on your feel. You’ve completed the exercises once and still don’t feel loose enough? Go for another round before you get into your true program for the day.
Lucky 7 Mobility Routine
Use the Lucky 7 Mobility Routine to cool down after your workout. You can also use it as a short routine to stretch out your body on the days you’re not working out. We also included a quick description for each exercise listed below as well as a video example provided by Guillaume.
-
- Wall Squat Hold x3-5 minutes
- Wall ADD V leg Hold x3-5 minutes
- Half Knee Trunk Rotation x10-20 rotations
- Couch Stretch Overhead Reach stretch x 2 min on each side
- 3-Way Dynamic Washer Stretch x As needed on each side
- Open Book Stretch x10-20 on each side
- Child's Pose Dynamic Stretch x10-20
1. Wall Squat Hold
We start off with the Wall Squat Hold, an effective exercise that targets your lower body muscles and should help reduce the pain from the exercises that target the legs. Check out the video example below or look at the quick step-by-step description that follows.
-
- Lay down next to a wall and lift you’re your legs to your chest as if you were attempting a very deep squat.
- While in this position, rotate your body as to have your feet against the wall and your bottom as close to the wall as possible.
- At this point, you should feel a deep stretch in your lower ends and your lower back.
- Don’t forget to take deep breaths throughout the pose.
- Hold this pose for 3 to 5 minutes before moving on to the next move. (You actually don’t need to move too much.)
2. Wall V Leg Hold
Following the squat hold, you’ll stay in the same position, but you’ll be extending your legs out to form a V. This one should help with the flexibility in your hamstrings and your lower back. Watch the video below for a quick demonstration or use the description below if you want more details.
-
- Start in the Wall Squat Hold from the previous stretch.
- Extend out your legs so as to have the back of your heel facing the wall.
- Stretch your legs as far as you can without overextending your knees.
- Keep a slight bend to them if you’re worried about injuries.
- Here again, breathe through this exercise and hold the pose for 3 to 5 minutes.
3. Half Knee Trunk Rotation
The Half Knee Trunk Rotation will help with mobility and flexibility in your core and your hips. In the example you can watch below, Guillaume is using a stick for balance, but you can also join your hands behind your head to help this too if you can’t use a stick. Consult the full description under the example for more information.
-
- Stand with your feet shoulder-width apart.
- If you have one, run a stick behind your neck while holding both ends with your hands. If you don’t have a stick, interlock your fingers behind your head.
- Take a step forward with your right foot, lowering your body into a lunge position. You may rest your back knee on the ground.
- Ensure your front knee is directly above your ankle, forming a 90-degree angle.
- While in the lunge position, rotate your torso to the right. Keep your core engaged, and ensure your hips stay facing forward.
- In a controlled manner, rotate your torso all the way back to your left to complete a rotation.
- Do full 10 to 20 rotations, then switch the position of your legs, before doing another 10 to 20 rotations.
4. Couch Stretch Overhead Reach
The Couch Stretch Overhead Reach demands the installation of a slight setup where you’ll use a bench or some sort of elevated surface. You might also want to use a towel or some sort of pad for extra support below the knee at the back. The video below provides a great visual example, but you can always check out the complete breakdown that follows.
-
- Start in a half-kneeling position with one knee on the ground and the other resting on an elevated surface or against the wall, creating a 90-degree angle with your front knee.
- Join your hands together and extend your arms above your head.
- Start the motion by leaning your upper body to the front leg side.
- Lean as far as you feel comfortable, then return to the original position. Keep control over the movement throughout this exercise.
- Keep stretching to this one side for 2 minutes, then switch your legs around and repeat the move for another 2 minutes on the other side.
5. 3 Way Dynamic Washer Stretch
This next move, the 3 Way Dynamic Washer Stretch will help improve flexibility and mobility in your lower back, your hips, and your legs. Use the video below as a reference or read our complete description for more help.
-
- Sit on the ground with your legs in front of you. Join your feet by the sole, bend your knees, and let your legs rest to the side.
- Turn one of your legs over and move it to the side so that your sole now faces backward.
- From this position, put your hands out in front of you, slightly above the ground.
- Begin the motion by leaning your upper body forward, then bringing it back to its original position.
- Angle your next lean to the left, while keeping your shoulders level to the ground and your face pointing in the direction in which you’re leaning. Finally, return to the original position.
- Your next lean should be to the middle again.
- The following lean should be to the right.
- Repeat the sequence for as much as desired, then switch your legs around and repeat the process.
6. Open Book Stretch
The penultimate stretch is the Open Book Stretch which is beneficial for improving thoracic spine mobility. The video below will serve as a great example, but you can also consult our full breakdown.
-
- Lie on your side with your top knee bent at a 90-degree angle. Use a foam roller or something similar to support your leg.
- Keep your lower body stable while extending your arms straight out in front of you.
- Inhale deeply, then exhale as you open your top arm across your body, reaching toward the floor on the opposite side.
- Aim to rotate your upper torso, feeling a stretch in the upper back and chest.
- Stretch out fully and in a controlled manner. When you hit the ground on the opposite side, return your arm to its original position.
- Repeat the motion 10 to 20 times.
- After completing the reps on one side, make sure to turn to the other side and complete as many reps.
7. Child's Pose Dynamic Stretch
The final stretch of this routine is the Child's Pose Dynamic Stretch, a yoga-inspired exercise that provides a great stretch for the lower back, hips, and thighs.
-
- Start on your hands and knees in a tabletop position.
- Sit back onto your heels, extending your arms forward on the floor.
- Keep your arms shoulder-width apart and your palms flat on the ground.
- Lower your chest towards the floor while keeping your buttocks on your heels.
- Feel the stretch in your lower back, hips, and thighs.
- Hold the stretch for a few breaths, focusing on relaxation and deep breathing.
- To add a dynamic element, reach your hands to one side to intensify the stretch on one side of your body.
- Alternate sides throughout the stretch walking your hands from one side to the next.
- Reach from side to side 10 to 20 times to finish out the Lucky 7 Mobility Routine!
Now that you’re well-versed in the keys to developing this program, the next step is implementation and progression. And don't forget to check out our tips on how to keep your golf swing ready at all times, as well as tips on how to get ready for the return of golf season.
Good job!
Further reading
Returning to the course after a long break can be difficult. Keep your back fresh and ready with these five key back stretches for golf players!
We have five essentials exercises for you to avoid injuries when you return to the course!
